# ====== DATA PREPARATION ======
data <- read.csv("mydata.csv")
data$gender <- factor(data$gender)
data$age <- as.numeric(data$age)

# ===== VISUAL EXPLORATION =====
boxplot(age ~ gender, data = data)
hist(data$age)Week 6: Work strategy
Learning outcomes
By the end of this topic, you should know how to
- Create and maintain readable and runnable code
- Debug
Rerrors (at least some basic ones) - Store objects from
Rsessions permanently - Run external
Rscripts - Handle and save graphical windows
Work strategy
R scripts
The most important type of file when working with R are the files with the .R extension. These contain code that can be run and are where you will save the majority of your work.
Because these are so essential, it is important to maintain your R scripts so that they are easy to use, fix, and modify.
On the following slides you will see various tips and tricks for having well-maintained R scripts.
You might think some of this advice does not apply to the relatively small coding tasks you have been doing so far… even so, trust us that following these tips will help you at some point.
Sectioning code
It can be very helpful for code readability to clearly divide your code into sections based on what each part of the script is achieving. For example:
It does not really matter how you denote the sections, as long it is clear.
Variable naming
This was briefly discussed in Week 1, but good naming of variables can make your code easier to work with and understand.
This mainly comes in the form of ensuring variable names are meaningful.
# Example:
results <- c("PASS", "FAIL", "FAIL", "PASS", "PASS")
fails <- sum(results == "FAIL") # bad
# The name "fails" is not very descriptive.
# It could be a list of students who failed or their average mark or almost anything.

number_of_fails <- sum(results == "FAIL") # good
# Clearly states what it is measuring and gives an indication of its data type.
Having well named variables also means you need fewer comments, because your code is “self-documenting”.
A more minor point is keeping a consistent naming strategy and format. There are many different ways to name variables such as:
number_of_fails
numberOfFails
NumberOfFails
number.of.fails
There is no issue with any of these, but it normally will serve you better to keep it consistent.
Indenting code
This is very much a stylistic point, but it will benefit you greatly in the long run in making your code readable.
The core idea is that indentation should make clear to a reader which lines belong to which “branch” of your code.
The rule of thumb is that whenever you open a pair of braces {}, any code in between the open and close should be indented by using Tab. RStudio will partially do this for you, but when code gets messy sometimes it does not do it correctly.
Which of the below is easier to read?
for (i in 1:10) {
b = i + 2
for (j in 1:10) {
a =i*j
if (b*a%%2==0){
print("Even result")} else {
  print("Odd result")
}
}}

for (i in 1:10) {
  b = i + 2
  for (j in 1:10) {
    a = i * j
    if (b * a %% 2 == 0){
      print("Even result")
    } else {
      print("Odd result")
    }
  }
}
Several other rules have been applied within the above code, such as the formatting of if else statements and spacing in mathematical operations. None of these are “mandatory”, but they will make your code easier to use and read.
Keeping backups
As your projects become larger and more complicated, the probability of accidentally damaging your code (and being unable to retrace your steps) grows.
In addition to this, sometimes you may delete or replace a piece of code, only to later realise that code was useful for some other purpose.
So, it is important to always keep backups of old versions of your code. The simplest way is to make a custom “backups” folder and regularly duplicate your code and save the duplicates as code_v1.R, code_v2.R, etc.
Even if you have your code stored in a cloud storage service that can restore old versions, it is still beneficial to make your own backups at “significant points” in the development of your code.
For the more technologically inclined, using Git is the more robust way to maintain versions of your code, but using Git is not a requirement at all.
Maintaining runnable scripts
Many students will continually add to the same R script and use it by running specific sections in a mysterious order only they have the secret of.
While this may “work”, it is bad practice because:
- it makes very difficult for anyone else to use/understand your code (including a future version of you that forgot which chunk of code does what)
- when something “goes wrong”, it will harder for you to isolate where the issue is
There are two general principles to follow to avoid this:
- If you are completing multiple independent tasks (as part of one larger task), it is good to separate them into multiple scripts. More independent files with clear divided purposes makes your code easier to understand. Note a given R script can excute everything in another one… more on that in a few slides!
- Always ensure that your code remains runnable from start to finish in a clean workspace.
To test this, you should:
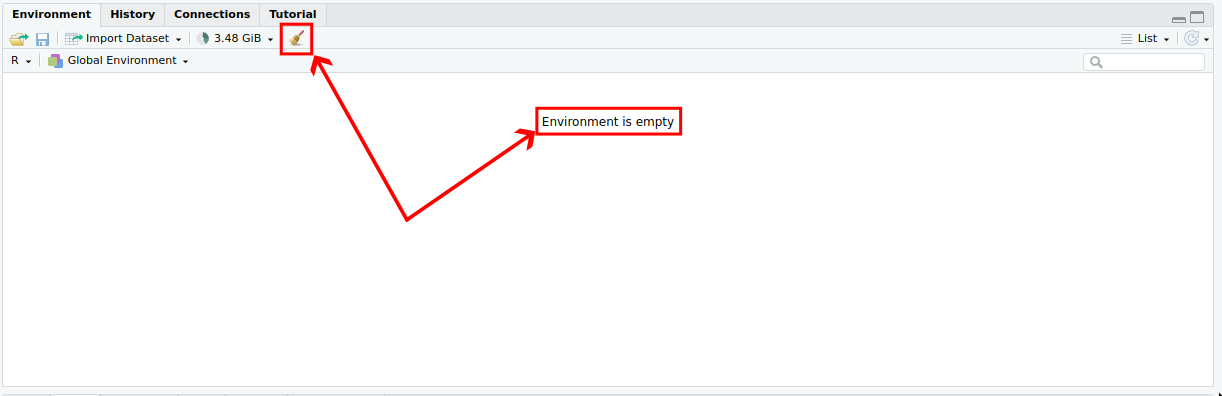
- Close RStudio or use the broom icon to clear your environment
- Use the Run button to run your entire R script

If there are any errors or your code does not run all the way through with the expected results, you should try and remedy these issues before continuing.
Errors - finding the problem
If you run your script all the way through and you find that R reports an error, you now have to find where the error occurred.
R will try and help you with this. It does not always produce the most useful error messages, but do read them!
To find the problem, it is best to run little bits of your code at a time until the error comes up so you can actually isolate the problem.
Remember you can use Ctrl+Enter to run one line of code at a time.
Errors - resolving the problem
As previously mentioned, R does not always provide the most useful error messages.
Unfortunately, there is no easy trick to resolving these, and fixing code is a skill that is learned rather than taught. However, here are some tips you should follow to help you get started:
- Read and try to understand the error message, even if you do not fully grasp it, this will make it easier the next time a similar issue arises;
- Check you have spelt all the variable and function names correctly;
- Check your brackets
()and braces{}are correctly paired up (RStudiohighlights the matching bracket for you, which can be helpful); - Check that all the variables you are using are of the right type, for example if you were doing
vec[other_vec > 3], double check thatother_vecis actually numeric; - Check the
helppage if you are using a function to make sure you are using it correctly and with the correct arguments; - Google the error message - you will often find some solved StackOverflow question that may give you an idea of what is wrong with your code (if not the exact resolution you need).
You will have trouble understanding and solving errors at the start, but have faith that with time you will mature as a coder and become proficient at solving errors more effectively.
Storing results permanently
Creating variables in R allows us to temporarily store results in our environment (aka workspace). But when you close your R session, the variables/objects are all lost.
This is unlikely to be an issue for work you do in this course as most of your code should run almost instantly. But, as you move to larger and more complex projects, some code may take hours to run, and in these cases, you do not want to keep rerunning that code each time you open R.
Luckily, R provides us with a way to save and reload objects in our workspace. The files we use for this have the .RData extension. Let’s talk about how to use them.
Storing results permanently continued
To save your workspace .RData file (also called workspace image):
save.image("C:/Users/...myproject.RData")- or in
Rstudio: Go to Session \(\rightarrow\) Save Work Space As… - or, when you quit a RStudio session, you are asked whether you want to save your workspace
To load a (previsously saved) workspace:
load("C:/Users/.../myproject.RData")- in
Rstudio: Go to Session \(\rightarrow\) Load Work Space…
Some points to keep in mind
- The second method for loading the workspace does not abide by the strategy of maintaining fully runnable code, because it would require you to manually load the data before running your code, so use that with care.
- The instructions above are to save your workspace (all objects produced by your script). It is not the same thing as saving your actual R script!
- If you have set your working directory appropriately (which you should), you do not have to specify “C:/Users/…” and can just specify
"myproject.RData". - If you load an
.RDataworkspace in your current R session, any object defined in your temporary workspace will be overwritten if there is an object of the same name in the loaded workspace.
Saving your Workspace - Example
# Set the working directory
setwd("C:/Users/z3519303/Dropbox/ALecturer_UNSW/2_Teaching")
# Save your workspace (called 'week6.rdata' in this example) in the working directory
save.image("week6.rdata")
Working directories and relative paths
While using working directories is convenient because we can specify shorter paths i.e., myproject.RData instead of C:/Users/.../myproject.RData, it is also important for the sake of reproducibility.
If you are working with other people on code and you use full paths (like C:/Users/.../myproject.RDdata) your code will not work for anyone else, because their directory structure will be different to yours.
On the other hand, if you manually set your working directory and then use “relative paths” like myproject.RData, then anyone can use your code as long as they set their working directory correctly from the start.
Calling an external R script
You can read and execute the contents of an external R script file using the source() function:
source("C:/Users/.../myscript.R")Alternatively, you can use the file.choose() function which allows you to ‘manually’ select a file
source(file.choose()) but do keep in mind that this again violates the principle of maintaining runnable code.
One possible utilisation of this feature is to call custom functions, which are stored in a different script
Indeed, you may want to use the same custom function(s) in many different projects
source("C:/Users/z3519303/Dropbox/ALecturer_UNSW/2_Teaching/my_functions.r")
# in my current script, I can now use all functions declared in file "my_functions.r"
Opening, closing and saving plots
In
Rstudio, when you create a plot, it displays by default in the tab called Plots (next to Files and Packages). Note that if you have created many plots, you can navigate from one to the other, using the arrows.You can also open a “graphical window”, with:
windows()for Windowsquartz()for MacOSx11()for Linux (if you are on x11)
Once opened, any new plot will be created in that Window, which exists outside Rstudio, and is more “interactive”. You can have many graphical windows open at once.
To close a graphical window, use:
dev.off(device-number).To save a plot:
export directly from the “Plots” tab in R Studio, by clicking “Export”
export directly from a “Window” by clicking “File” \(\rightarrow\) “Save as”
use the following code (this specifies the export plot name and features before it is created):
pdf(file="example12.pdf", width = 6, height = 4) # there is also png(), jpeg(), etc.
hist(runif(100))
dev.off()
Programming - Generative AI
As you are no doubt aware, generative artificial intelligence (AI) is now quite good at writing code, at least for narrow tasks.
We are not telling you to not use AI to assist you in writing code, BUT, you should not take shortcuts. You must always make sure you understand a piece of code that an AI has created. This is especially important for beginner coders.
If AI is always your crutch, you are not really learning to code.
While it may sound tedious to do (and even useless when the results “look good”), you must go over any AI-generated code, line by line, and:
- make sure you understand each element
- evaluate it with a critical eye… there could be errors and/or the AI might not achieve a task in the most efficient way possible.
A good heuristic to test if you haven’t taken a shortcut is to ask yourself: would I be confident to explain what this code does, line by line, to somebody else?
And, of course, when writing university assignments, always acknowledge in detail your use of AI (as required by your lecturer). See here how to reference AI use at UNSW: https://www.student.unsw.edu.au/ai-referencing.
Homework
Homework Exercise 1
vec <- c("2", "3", "5", "4", "1")
for (v in vec) {
  if (v > 2.5) {
    print("v is greater than 2.5")
}
Copy this code into your local RStudio and fix the code such that it produces the output
[1] "3 is greater than 2.5"
[1] "5 is greater than 2.5"
[1] "4 is greater than 2.5"
Homework Exercise 2
x = c(1, 5, 6, 3, 5, 2, 3, 4, 5, 7, 8)
y = runif(12, 1, 0)
plot(x, y)
Copy this code into your local RStudio and fix the code such that it produces a proper plot.
Homework Exercise 3
We wish to evaluate the following \[ \frac{1}{2 \log(5)} \exp\left(0.4\pi\right)\] So we use the following code
first_term <- 1/2*log(5)
second_term <- exp(.4 * Pi)
frist_term * second_term
Copy this code into your local RStudio and fix the code such that it produces the result
[1] 1.091557
Comments
Comments in R scripts are almost as important as the code itself. Comments are denoted by a
#and they indicate text that should not be treated as code, but simply as text (and which R does not run).Sometimes raw code can get confusing, and the purpose of some code may not be entirely clear. In these situations, having comments explaining what your code does can be extremely beneficial not only to you but also to anyone else who may be reading your code.
Take the following example:
This is a function which computes numbers in the Fibonacci sequence. If you opened someone else’s
Rscript and you saw this function, you are likely to (and should) ask the following questions:ndo?fulldo?If someone does not leave comments, then you are left to try and answer all of these questions just by looking at the code. In this case the code is not too complex and you may be able to, but irrespective of this, would it not be easier to answer these questions if the code was commented as below:
This code is slightly “over commented” to illustrate a point, but if someone had left these comments, you would be able to answer all of your questions much more easily.
In general whenever you write code, try to imagine yourself in some other person’s shoes who knows nothing about your code. Ask yourself whether they would be able to understand what is happening without analysing every line of code carefully. If they wouldn’t, then add some comments until you think they would be. Note that this hypothetical “other person” might be… you at some future time.